Compiling for Windows
Requirements
For compiling under Windows, the following is required:
- Visual C++, Visual Studio Community (recommended), version 2013 (12.0) or later. Make sure you read Installing Visual Studio caveats below or you will have to run/download the installer again.
- Python 2.7+ or Python 3.5+.
- Pywin32 Python Extension for parallel builds (which increase the build speed by a great factor).
- SCons build system.
Setting up SCons
Python adds the interpreter (python.exe) to the path. It usually
installs in C:\Python (or C:\Python[Version]). SCons installs
inside the Python install (typically in the Scripts folder) and
provides a batch file called scons.bat.
The location of this file can be added to the path or it can simply be
copied to C:\Python together with the interpreter executable.
To check whether you have installed Python and SCons correctly, you can
type python --version and scons --version into the
Windows Command Prompt (cmd.exe).
If commands above do not work, make sure you add Python to your PATH environment variable after installing it, and check again.
Setting up Pywin32
Pywin32 is required for parallel builds using multiple CPU cores. If SCons is issuing a warning about Pywin32 after parsing SConstruct build instructions, when beginning to build, you need to install it properly from the correct installer executable for your Python version located at Sourceforge.
For example, if you installed a 32-bit version of Python 2.7, you would want
to install the latest version of Pywin32 that is built for the mentioned version
of Python. That executable installer would be named pywin32-221.win32-py2.7.exe.
The amd64 version of Pywin32 is for a 64-bit version of Python
pywin32-221.win-amd64-py2.7.exe. Change the py number to install for
your version of Python (check via python --version mentioned above).
Installing Visual Studio caveats
If installing Visual Studio 2015 or later, make sure to run Custom installation, not Typical and select C++ as language there (and any other things you might need). The installer does not install C++ by default. C++ was the only language made optional in Visual Studio 2015.
If you have already made the mistake of installing a Typical, installation, rerun the executable installer you downloaded from internet, it will give you a Modify Button option. Running the install from Add/Remove programs will only give you the “Repair” option, which will do nothing for your problem.
If you’re using Express, make sure you get/have a version that can compile for *C++, Desktop*.
Downloading Godot’s source
Godot’s source is hosted on GitHub. Downloading it (cloning) via Git is recommended.
The tutorial will presume from now on that you placed the source into
C:\godot.
Compiling
SCons will not be able out of the box to compile from the
Windows Command Prompt (cmd.exe) because SCons and Visual C++ compiler
will not be able to locate environment variables and executables they
need for compilation.
Therefore, you need to start a Visual Studio command prompt. It sets up environment variables needed by SCons to locate the compiler. It should be called similar to one of the below names (for your respective version of Visual Studio):
- “Developer Command Prompt for VS2013”
- “VS2013 x64 Native Tools Command Prompt”
- “VS2013 x86 Native Tools Command Prompt”
- “VS2013 x64 Cross Tools Command Prompt”
- “VS2013 x86 Cross Tools Command Prompt”
You should be able to find at least the Developer Command Prompt for your version of Visual Studio in your start menu.
However Visual Studio sometimes seems to not install some of the above shortcuts, except the Developer Console at these locations that are automatically searched by the start menu search option:
Win 7:
C:\ProgramData\Microsoft\Windows\Start Menu\Programs\Visual Studio 2015\Visual Studio Tools
C:\ProgramData\Microsoft\Windows\Start Menu\Programs\Visual Studio 2013\Visual Studio Tools
If you found the Developer Console, it will do for now to create a 32-bit version of Godot, but if you want the 64-bit version, you might need to setup the prompts manually for easy access.
If you don’t see some of the shortcuts, “How the prompts actually work” section below will explain how to setup these prompts if you need them.
About the Developer/Tools Command Prompts and the Visual C++ compiler
There is a few things you need to know about these consoles and the Visual C++ compiler.
Your Visual Studio installation will ship with several Visual C++
compilers, them being more or less identical, however each cl.exe
(Visual C++ compiler) will compile Godot for a different architecture
(32-bit x86 or 64-bit x86; the ARM compiler is not supported).
The Developer Command Prompt will build a 32-bit version of Godot by using the 32-bit Visual C++ compiler.
Native Tools Prompts (mentioned above) are used when you want the 32-bit cl.exe to compile a 32-bit executable (x86 Native Tools Command Prompt). For the 64-bit cl.exe, it will compile a 64-bit executable (x64 Native Tools Command Prompt).
The Cross Tools are used when your Windows is using one architecture (32-bit, for example) and you need to compile to a different architecture (64-bit). As you might be familiar, 32-bit Windows can not run 64-bit executables, but you still might need to compile for them.
For example:
- “VS2013 x64 Cross Tools Command Prompt” will use a 32-bit cl.exe that will compile a 64 bit application.
- “VS2013 x86 Cross Tools Command Prompt” will use a 64-bit cl.exe that will compile a 32-bit application. This one is useful if you are running a 32-bit Windows.
On a 64-bit Windows, you can run any of above prompts and compilers
(cl.exe executables) because 64-bit Windows can run any 32-bit
application. 32-bit Windows cannot run 64-bit executables, so the
Visual Studio installer won’t even install shortcuts for some of
these prompts.
Note that you need to choose the Developer Console or the correct Tools Prompt to build Godot for the correct architecture. Use only Native Prompts if you are not sure yet what exactly Cross Compile Prompts do.
Running SCons
Once inside the Developer Console/Tools Console Prompt, go to the root directory of the engine source code and type:
C:\godot> scons platform=windows
Tip: if you installed “Pywin32 Python Extension” you can append the -j command to instruct SCons to run parallel builds like this:
C:\godot> scons -j6 platform=windows
In general, it is OK to have at least as many threads compiling Godot as you have cores in your CPU, if not one or two more. Feel free to add the -j option to any SCons command you see below if you setup the “Pywin32 Python Extension”.
If all goes well, the resulting binary executable will be placed in
C:\godot\bin\ with the name of godot.windows.tools.32.exe or
godot.windows.tools.64.exe. SCons will automatically detect what
compiler architecture the environment (the prompt) is setup for and will
build a corresponding executable.
This executable file contains the whole engine and runs without any dependencies. Executing it will bring up the Project Manager.
How the prompts actually work
The Visual Studio command prompts are just shortcuts that call the standard Command Prompt and have it run a batch file before giving you control. The batch file itself is called vcvarsall.bat and it sets up environment variables, including the PATH variable, so that the correct version of the compiler can be run. The Developer Command Prompt calls a different file called VsDevCmd.bat but none of the other tools that this batch file enables are needed by Godot/SCons.
Since you are probably using Visual Studio 2013 or 2015, if you need to recreate them manually, use the below folders, or place them on the desktop/taskbar:
C:\ProgramData\Microsoft\Windows\Start Menu\Programs\Visual Studio 2015\Visual Studio Tools
C:\ProgramData\Microsoft\Windows\Start Menu\Programs\Visual Studio 2013\Visual Studio Tools
Start the creation of the shortcut by pressing the right mouse
button/New/Shortcut in an empty place in your desired location.
Then copy one of these commands below for the corresponding tool you need into the “Path” and “Name” sections of the shortcut creation wizard, and fix the path to the batch file if needed.
- Visual Studio 2013 is in the “Microsoft Visual Studio 12.0” folder.
- Visual Studio 2015 is in the “Microsoft Visual Studio 14.0” folder.
- etc.
Name: Developer Command Prompt for VS2013
Path: %comspec% /k ""C:\Program Files (x86)\Microsoft Visual Studio 12.0\Common7\Tools\VsDevCmd.bat""

Name: VS2013 x64 Cross Tools Command Prompt
Path: %comspec% /k ""C:\Program Files (x86)\Microsoft Visual Studio 12.0\VC\vcvarsall.bat"" x86_amd64

Name: VS2013 x64 Native Tools Command Prompt
Path: %comspec% /k ""C:\Program Files (x86)\Microsoft Visual Studio 12.0\VC\vcvarsall.bat"" amd64

Name: VS2013 x86 Native Tools Command Prompt
Path: %comspec% /k ""C:\Program Files (x86)\Microsoft Visual Studio 12.0\VC\vcvarsall.bat"" x86

Name: VS2013 x86 Cross Tools Command Prompt
Path: %comspec% /k ""C:\Program Files (x86)\Microsoft Visual Studio 12.0\VC\vcvarsall.bat"" amd64_x86
After you create the shortcut, in the shortcut’s properties, that you can access by right clicking with your mouse on the shortcut itself, you can choose the starting directory of the command prompt (“Start in” field).
Some of these shortcuts (namely the 64-bit compilers) seem to not be
available in the Express edition of Visual Studio or Visual C++. Before
recreating the commands, make sure that cl.exe executables are present
in one of these locations, they are the actual compilers for the
architecture you want to build from the command prompt.
x86 (32-bit) cl.exe
C:\Program Files (x86)\Microsoft Visual Studio 12.0\VC\bin\cl.exe

x86 (32-bit) cl.exe for cross-compiling for 64-bit Windows.
C:\Program Files (x86)\Microsoft Visual Studio 12.0\VC\bin\x86_amd64\cl.exe

x64 (64-bit) cl.exe
C:\Program Files (x86)\Microsoft Visual Studio 12.0\VC\bin\amd64\cl.exe

x64 (64-bit) cl.exe for cross-compiling for 32-bit Windows.
C:\Program Files (x86)\Microsoft Visual Studio 12.0\VC\bin\amd64_x86\cl.exe
In case you are wondering what these prompt shortcuts do, they call cmd.exe
with the \k option and have it run a Batch file.
%comspec% - path to cmd.exe
\k - keep alive option of the command prompt
remainder - command to run via cmd.exe

cmd.exe \k(eep cmd.exe alive after commands behind this option run) ""runme.bat"" with_this_option
How to run an automated build of Godot
If you just need to run the compilation process via a Batch file or directly in the Windows Command Prompt you need to use the following command:
"C:\Program Files (x86)\Microsoft Visual Studio 12.0\VC\vcvarsall.bat" x86
with one of the following parameters:
- x86 (32-bit cl.exe to compile for the 32-bit architecture)
- amd64 (64-bit cl.exe to compile for the 64-bit architecture)
- x86_amd64 (32-bit cl.exe to compile for the 64-bit architecture)
- amd64_x86 (64-bit cl.exe to compile for the 32-bit architecture)
and after that one, you can run SCons:
scons platform=windows
or you can run them together:
32-bit Godot
"C:\Program Files (x86)\Microsoft Visual Studio 12.0\VC\vcvarsall.bat" x86 && scons platform=windows

64-bit Godot
"C:\Program Files (x86)\Microsoft Visual Studio 12.0\VC\vcvarsall.bat" amd64 && scons platform=windows
Development in Visual Studio or other IDEs
For most projects, using only scripting is enough but when development in C++ is needed, for creating modules or extending the engine, working with an IDE is usually desirable.
You can create a Visual Studio solution via SCons by running SCons with
the vsproj=yes parameter, like this:
scons p=windows vsproj=yes
You will be able to open Godot’s source in a Visual Studio solution now, and able to build Godot via the Visual Studio Build button. However, make sure that you have installed Pywin32 so that parallel (-j) builds work properly.
If you need to edit the compilation commands, they are located in “Godot” project settings, NMAKE sheet. SCons is called at the end of the commands. If you make a mistake, copy the command from one of the other build configurations (debug, release_debug, release) or architectures (Win32/x64). They are equivalent.
Cross-compiling for Windows from other operating systems
If you are a Linux or macOS user, you need to install MinGW-w64, which typically comes in 32-bit and 64-bit variants. The package names may differ based on your distro, here are some known ones:
| Arch | pacman -S scons mingw-w64-gcc
|
| Debian / Ubuntu | apt-get install scons mingw-w64
|
| Fedora | dnf install scons mingw32-gcc-c++ mingw64-gcc-c++
|
| macOS | brew install scons mingw-w64
|
| Mageia | urpmi scons mingw32-gcc-c++ mingw64-gcc-c++
|
Before allowing you to attempt the compilation, SCons will check for
the following binaries in your $PATH:
i686-w64-mingw32-gcc
x86_64-w64-mingw32-gcc
If the binaries are not located in the $PATH (e.g. /usr/bin),
you can define the following environment variables to give a hint to
the build system:
export MINGW32_PREFIX="/path/to/i686-w64-mingw32-"
export MINGW64_PREFIX="/path/to/x86_64-w64-mingw32-"
To make sure you are doing things correctly, executing the following in the shell should result in a working compiler (the version output may differ based on your system):
user@host:~$ ${MINGW32_PREFIX}gcc --version
i686-w64-mingw32-gcc (GCC) 6.1.0 20160427 (Mageia MinGW 6.1.0-1.mga6)
Troubleshooting
Cross-compiling from some versions of Ubuntu may lead to this bug, due to a default configuration lacking support for POSIX threading.
You can change that configuration following those instructions, for 32-bit:
sudo update-alternatives --config i686-w64-mingw32-gcc
<choose i686-w64-mingw32-gcc-posix from the list>
sudo update-alternatives --config i686-w64-mingw32-g++
<choose i686-w64-mingw32-g++-posix from the list>
And for 64-bit:
sudo update-alternatives --config x86_64-w64-mingw32-gcc
<choose x86_64-w64-mingw32-gcc-posix from the list>
sudo update-alternatives --config x86_64-w64-mingw32-g++
<choose x86_64-w64-mingw32-g++-posix from the list>
Creating Windows export templates
Windows export templates are created by compiling Godot as release, with the following flags:
- (using Mingw32 command prompt, using the bits parameter)
C:\godot> scons platform=windows tools=no target=release bits=32
C:\godot> scons platform=windows tools=no target=release_debug bits=32
- (using Mingw-w64 command prompt, using the bits parameter)
C:\godot> scons platform=windows tools=no target=release bits=64
C:\godot> scons platform=windows tools=no target=release_debug bits=64
- (using the Visual Studio command prompts for the correct architecture, notice the lack of bits parameter)
C:\godot> scons platform=windows tools=no target=release
C:\godot> scons platform=windows tools=no target=release_debug
If you plan on replacing the standard templates, copy these to:
C:\USERS\YOURUSER\AppData\Roaming\Godot\Templates
With the following names:
windows_32_debug.exe
windows_32_release.exe
windows_64_debug.exe
windows_64_release.exe
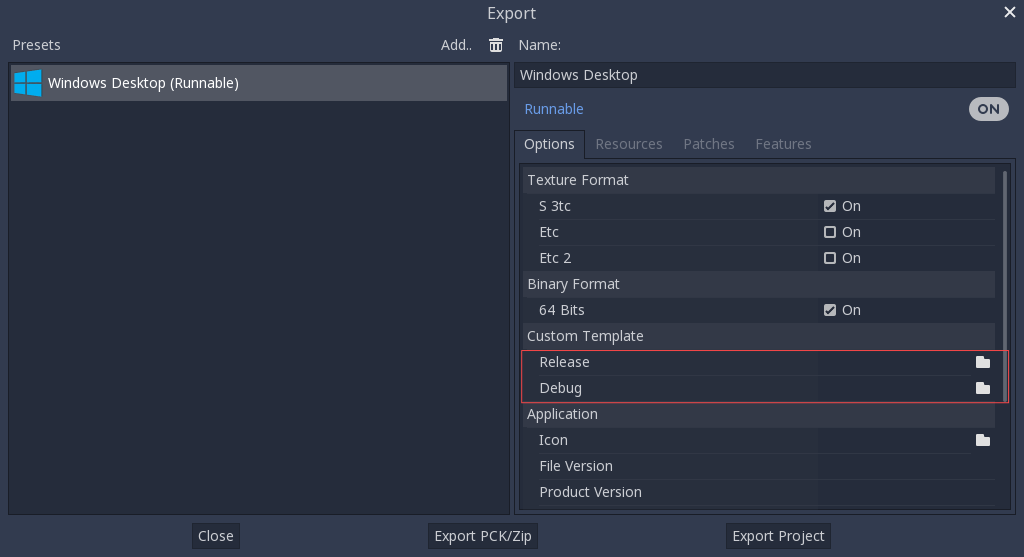
However, if you are writing your custom modules or custom C++ code, you might instead want to configure your binaries as custom export templates here:
You don’t even need to copy them, you can just reference the resulting
files in the bin\ directory of your Godot source folder, so the next
time you build you automatically have the custom templates referenced.